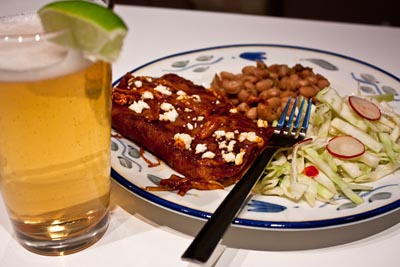
I have lived in Austin for over ten years now. It’s been a pleasure to watch as the local food culture has developed, and this city and its surrounding environs are, in my mind, one of the finest culinary destinations in the states. Sometimes though, I have a hankering for simple, good Texas-meets-Mexico fare. Add beer, add napkins, subtract esoterica, subtract frills. This week’s experiment: Red Chile Enchiladas with Slow-simmered Pinto Beans.
This year is the first that I’ve subscribed to Saveur (after winning in a drawing just for being a member of this site), but I’ve grown to adore it. The slightly unpolished realism of the writing and subject matter is compelling diverse, and the recipes seem authentic, unembellished, real.
When The Texas Issue (July 2009) arrived, I was beside myself with excitement. Buried in its pages are gobs of dishes I’d like to learn how to prepare. Though it was difficult to choose, I eventually settled on the Red Chile Enchiladas and the Slow-simmered Pinto Beans.
Pinto beans rock my socks. They’re extremely cost effective (mine were 84 cents for a pound of dried beans) and once fully cooked, their texture becomes creamy and their flavor almost buttery. This pinto bean recipe produces a huge pot of beans (enough for probably 8 or 10 people if served as a side dish) richly flavored by the additions of bacon (my home-cured bacon, no less), onions, and serrano chiles. The completed flavor was hearty, deep with smoke and spicy heat.
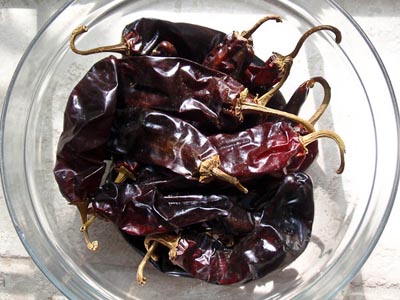
The Red Chile Enchiladas were a fun experiment. I love any recipe that allows me to use dried chiles, and this one makes use of dried New Mexico chiles. These peppers, usually still green when enjoyed fresh, are allowed to ripen to a deep red before being dried. Mellow and sweet (and ever-so-slightly bitter), the dried chiles are softened in boiling water, stemmed and seeded, then pureed with other ingredient to create a brilliant brick-red sauce.
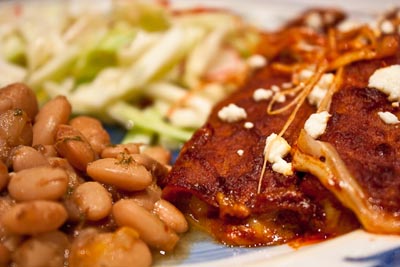
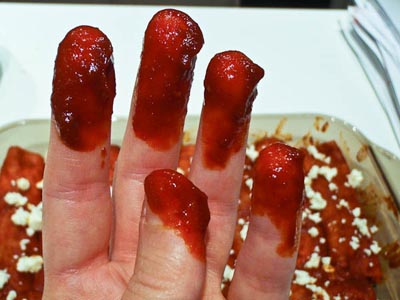
The process of rolling the enchiladas was interesting. I’ve used it before with a Diana Kennedy salsa verde chicken enchilada recipe. The sauce is heated and held in a skillet. In another skillet is half an inch or so of vegetable oil, heated to 325-350 degrees (F). First the corn tortilla is fried briefly in the oil. Next, it is removed with tongs, the extra oil is gently shaken off, and it is coated with the sauce. Then the tortilla is filled, rolled, and placed in a baking dish. Corn tortillas are notoriously fragile. This method makes the tortilla at once tougher and more pliable, allowing it to be stuffed and rolled with a minimum of breakage (though your fingers do get very messy).
1 pound dried pinto beans
1⁄4 pound bacon, diced
10 sprigs cilantro, chopped
2 garlic cloves, smashed
1 serrano chile, split
1 medium onion, chopped
1 large tomato, chopped
Kosher salt, to taste
Combine all the ingredients except salt with six cups of water in a 6 quart dutch oven. Bring the mixture to a boil. Reduce heat to medium-low and simmer, partially covered until the beans are tender, 2 ½ to 3 hours. Stir occasionally to keep the beans from sticking. Add up to one cup of additional water if the beans appear to be drying out before they’re tender. At the very end of cooking, season with salt to taste.
Dust off the dried chiles and place them in a large bowl. Cover with boiling water, making sure they’re completely submerged and set sit for about twenty minutes. I weighted mine down with a heavy glass plate, adding a bit more boiled water to fully submerge the peppers peeking out from underneath it. After twenty minutes, the reconstituted chiles will regain some of their vibrant red color.
Remove the chiles from the water and keep two cups of the chile water. Remove the stems and seeds from the chiles.
Preheat the oven to 450 degrees (F).
Heat 3 tablespoons oil in a skillet over medium heat. Add garlic, stirring frequently till it becomes golden brown, two to four minutes. Transfer garlic to a blender, reserving the oil in the skillet. Add the chiles, the chile water, and the lime, cumin, sugar, and salt to blender and puree. It wasn’t required with the Vitamix, but for normal (read: more sensible) blenders, it would be best to strain the sauce through a fine-mesh sieve to remove any chunks that weren’t fully pulverized. Transfer sauce to the skillet with the reserved garlicky oil and heat.
Pour additional canola oil into a clean 10-inch skillet to a depth of ½-inch. Heat over medium-high heat to a temperature of roughly 325-350 degrees (F). Working with one tortilla at a time, fry briefly in the canola oil, turning as needed. When tortilla is slightly crisp, lift with tongs, allowing excess oil to drip back into pan, then dip in chile sauce to coat. Transfer to a small plate and sprinkle some mozzarella, sharp cheddar, and red onion down the center. Carefully roll the tortilla and place in a baking dish, seam-side down. Saveur suggests a baking sheet, but I had great success with a 13" x 9" Pyrex baking dish. Repeat with remaining eleven tortillas.
Whether you sprinkle with cotija cheese before baking or after is a matter of personal preference. I choose to throw in on beforehand. Even though cotija is so dry it doesn’t really melt, I like that it becomes somewhat softer and fuses to the tortillas and sauce. If you fall in this camp too, add the cheese, then bake your enchiladas for 5-10 minutes or until the cheese inside the enchiladas is melted. Otherwise, bake ‘em, then sprinkle the cotija on after you pull them out of the oven.
