I really don’t mind kneading dough for bread. It’s interesting to feel the texture change as you work the dough, and for the longest time, I felt that it was the only way to get it right. However, once I got the KitchenAid (you know, for grinding sausage), I discovered that for very little effort at all, I can have freshly baked sandwich bread and hamburger buns. For even less effort (and no stand mixer to clean up), I can have a lovely “artisan” loaf using the no-knead method.
When the no-knead bread craze swept through the food world, I essentially ignored it. I took it as an approach for people who don’t actually like baking to be able to churn out a passable loaf with minimal effort. Then I started to hear that people I trust and whose cooking talents I respect have had good luck with the recipe. Plus realistically, all I’d be wasting by trying was a little flour, water, oil, salt, yeast and time.
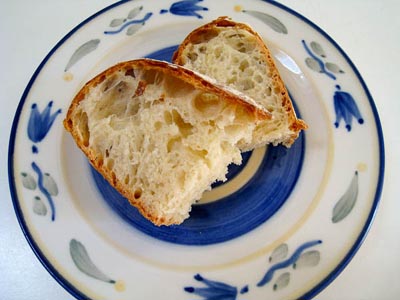
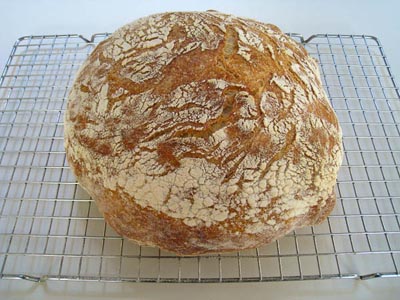
Rosemary Loaf, which rested on corn-meal while rising
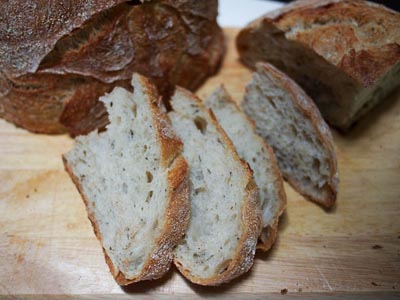
Since then, I’ve made loaf after gorgeous loaf. The original recipe is courtesy of Jim Lahey at Sullivan Street Bakery in New York City, and it is absolutely worth trying. The long rising time allows flavors to develop. The minimal kneading allows the not uniformly distributed yeasts to create a melange of variously-sized and shaped holes in your bread, giving it an interesting texture and a rustic appearance.
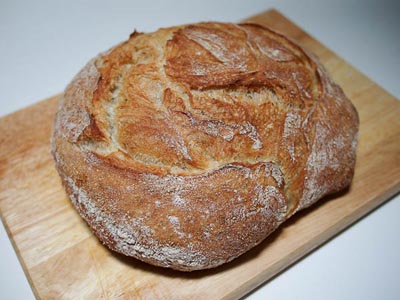
By baking it in a pre-heated Dutch oven, you’re essentially allowing it to provide its own steam (to help maximize “oven spring” and crust development). Because it is baked at a nice high temperature, the crust gets a chance to turn a lovely shade of caramel brown. The smell in the kitchen when you remove it from the oven is incredible.
Plain Loaf, which rested on flour while rising
I recently decided to solve a two-part problem. Problem 1: I don’t feel like kneading dough for 15 minutes in my hot Texas summer kitchen. Problem 2: my rosemary plant needs trimming back in a bad way. To that end, I bring you, No-knead Rosemary Bread.
For active dry yeast, use the same amount, but activate by mixing it into ¼-cup of lukewarm water (95-105 degrees F) for a few minutes. Mix 1 ½ cups water total into the dry mixture (1 ½ cups water, or ¼ cup yeasted water, 1 ¼ cups water). Shoot for your water to be room temperature or even a little cooler.
Grease a clean bowl with olive oil. Once the flour is sufficiently hydrated (mixture will not necessarily be uniform at this point), turn the dough into the clean, greased bowl, cover with plastic wrap, and allow to sit at room temperature for twelve hours (or even longer - this is pretty forgiving stuff).
At the end of the long wait, turn the dough out onto a floured work surface and gently fold a few times to bring the dough together. Allow this to sit and relax for fifteen minutes then gently shape into a boule or ball.
Coat a cotton towel with flour or cornmeal (I prefer cornmeal – the dough seems to come away from the towel better if it’s resting on cornmeal - I’ve included photos of both above, so you can see which aesthetic you’d prefer). Set the dough seam-side down on the cornmeal-coated towel, sprinkle generously with flour, then cover with a second cotton towel. Let this rise for another hour or two or until it has roughly doubled in size.
About 30 minutes before baking, place a 6-quart enameled cast iron Dutch oven and lid in the oven and preheat to 500 degrees (F). My bright red pot, after baking away for a half hour in a hot oven, turns an unsettling shade of burgundy. If this happens to you, don’t fret! Evidently it will turn to its normal color once it cools off again. And even if it doesn’t, those pots are for using, not looking pretty, right?
Next comes the most frightening part of the process. After the oven is sufficiently preheated and the dough has risen, it’s time to bake. Very carefully pull your Dutch oven out and set it on the stove top. Remove the lid and set it aside. Dump the dough onto your hand so that the seam is facing upward. Very carefully place this dough, seam-side-up, into the Dutch oven in such a way that you deflate it as little as possible while still minimizing contact between your delicate skin and the extremely hot cast iron. Place the lid on the pan, and return to the oven. Allow this to bake for 30 minutes.
At the end of the thirty minutes, remove the lid from the Dutch oven and allow to bake for an additional five minutes or so to allow the crust to brown just a bit more.
Remove the pan from the oven then remove the bread from the pan to let it cool. The crust will be gorgeous and the smell will be impossibly enticing, however, it’s critical at this point for you to resist. Allow the bread to cool for at least a half an hour before you break into it. A full hour might even be better. As it cools, you’ll hear the crust will crackle a bit, just like a good artisan loaf should.
A word of advice: when allowing the Dutch oven to cool on the stove top, throw a potholder on top of it as a reminder that it’s terribly hot. It’ll save you from mindlessly grabbing a fresh-from-a-500-degree-oven-pot with your bare hands.